Initial Setup: API Key
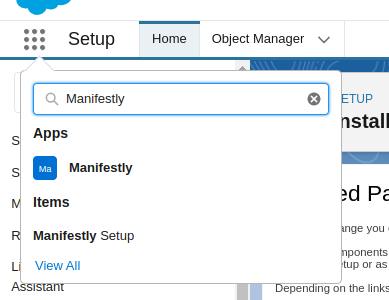
After package installation is completed in the App Launcher menu, you can find Manifestly Setup tab and the Manifestly app.
Open the Manifestly Setup tab to define your Manifest.ly API token. The message on the top represents the current status of the settings.

Enter your API token and click Save button. To create an API token, you’ll do that on the integrations tab of your Manifestly account settings page.
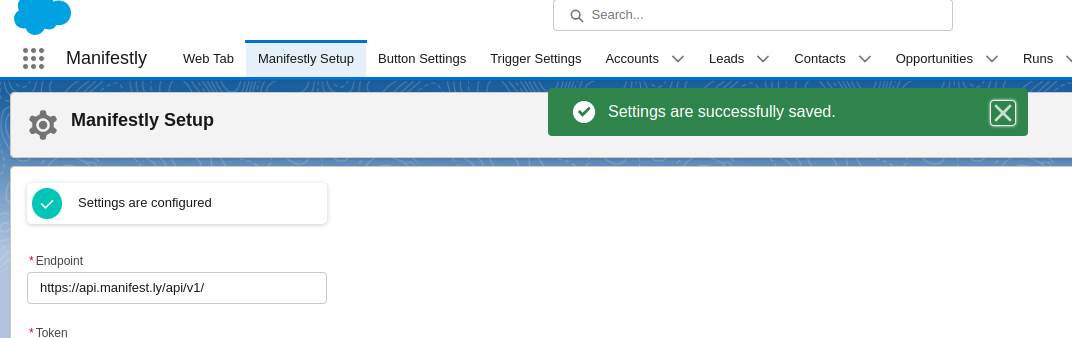
When you open this page again, you will only see the endpoint. The token is not displayed for security reasons, it is stored in a safe place and no one will see it. But the green icon means that the settings are completed and the application can be used.

The main screen of the app consists of several tabs.

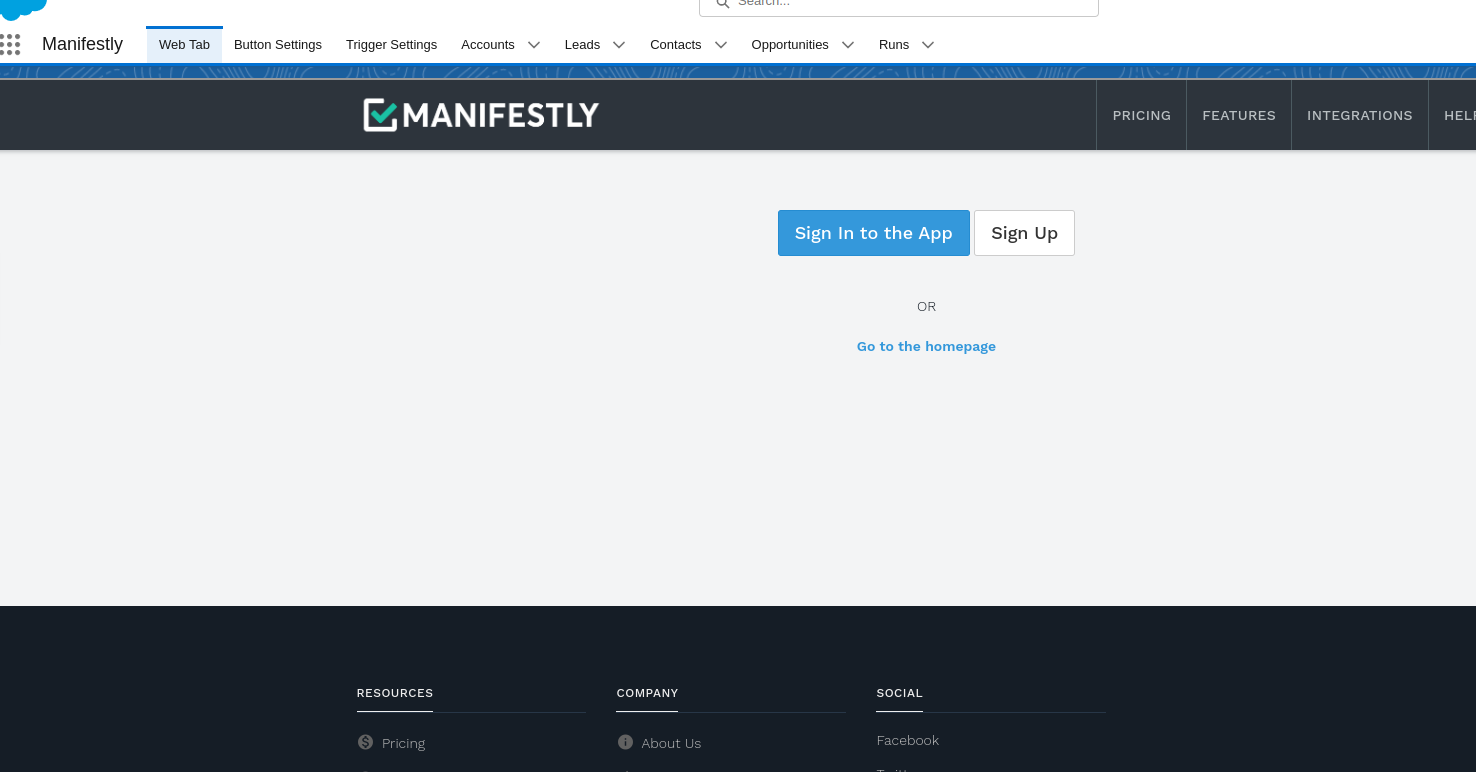
Web Tab
The Web Tab contains the Manifestly web site where you can sign in to your account and manage Workflows, Runs, etc. Currently, it is all the features available on app.manfest.ly.
Once you sign in, you’ll see the Manifestly dashboard. If you don’t yet have an account, you need to create a new Manifestly account to use this integration.
Button Settings
You can create buttons and locate them on any record type you wish. These buttons will launch workflow runs in Manifestly, passing the title of the object to that run.
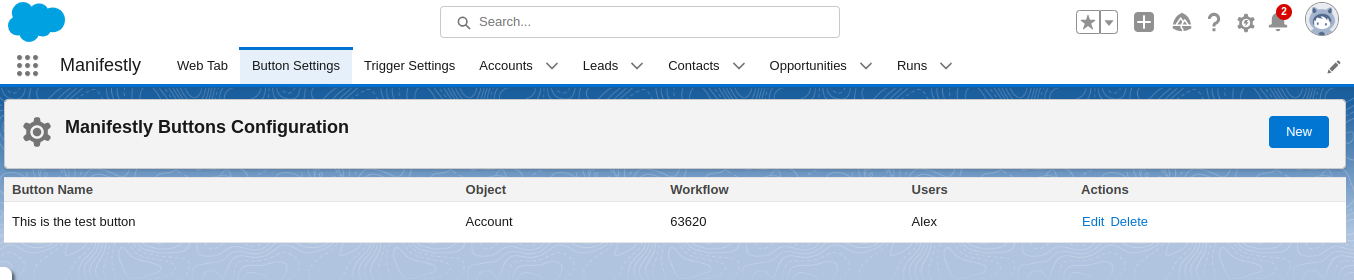
To create a new Button you need to click the New button in the header.
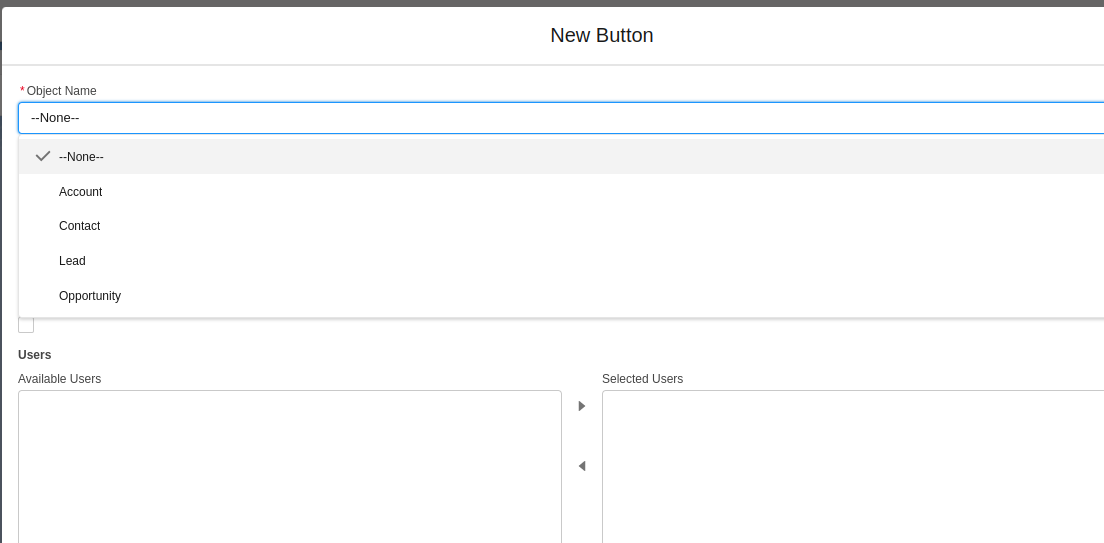
You can select the object on which page the button will be displayed. Four objects are available for selection: Account, Contact, Lead and Opportunity.
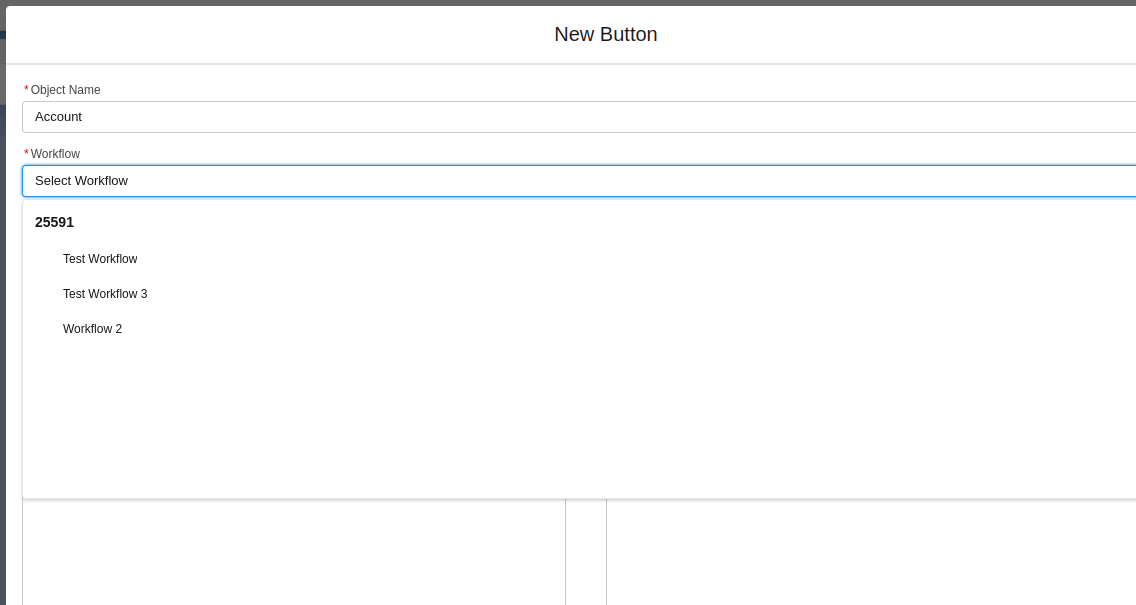
In the next form element you can select the workflow for which the new Run will be created after clicking the button. The list of workflows is loaded from the Manifestly service using the API you provided earlier. To create a new workflow you would need to use the Web Tab, or open Manifestly website outside of Salesforce.
Button Name is the label of the button that will be displayed on the record page.
Add the user who clicks the button to the new run– if this checkbox is checked, then after clicking the button on the record page, the system will search your Manifestly user list for a user with the same email as current salesforce user and add this user to the newly created Run.

When you select the Workflow in the previous step, the system will retrieve all Manifestly users in the same department as this workflow and display the list in the last form element. You can use this list to add users to the Run each time the button is clicked. This is in addition to any assignments you’ve set up for that Workflow and as such, this is optional.

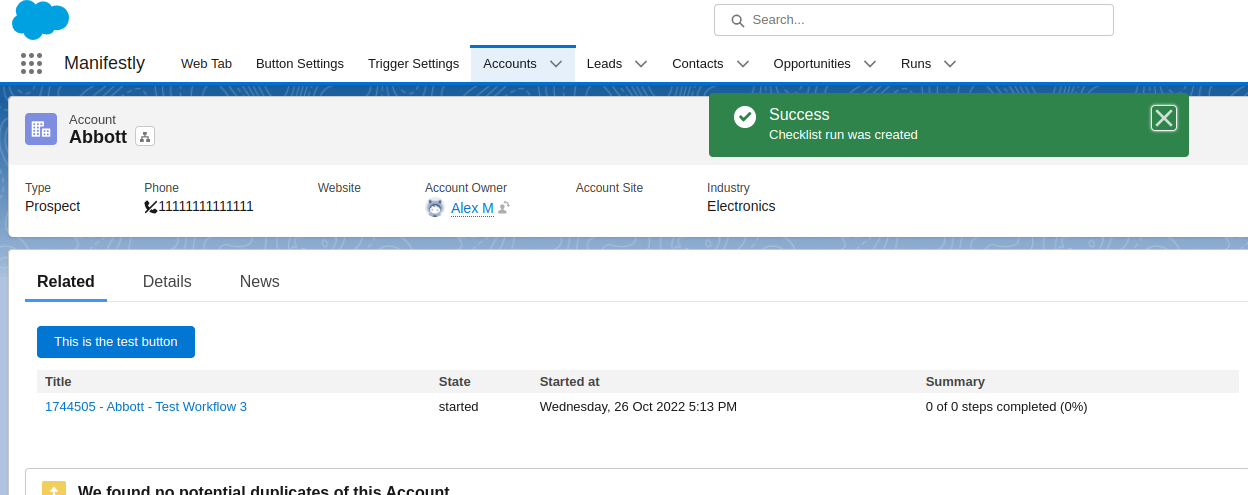
After saving the button, you can find this button on the record in the related list tab.

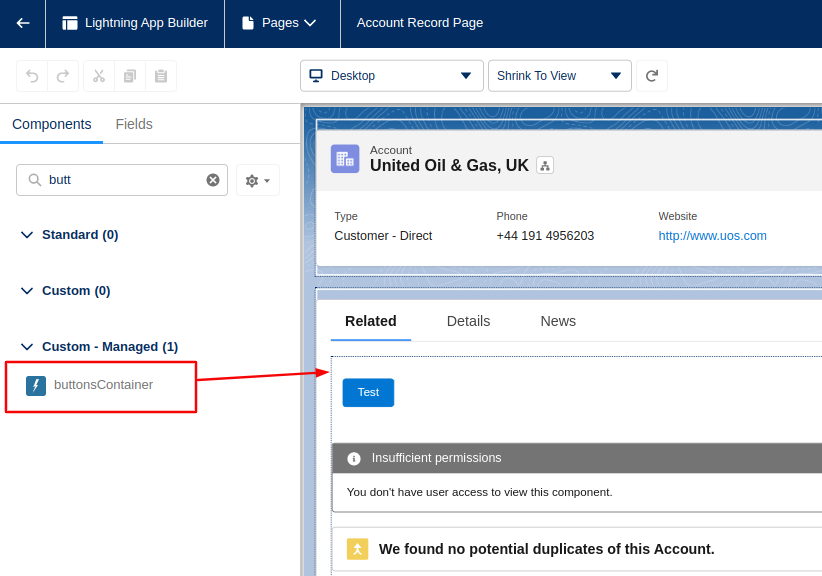
If you can’t see the button, you will need to add the component on the page. To do this click Edit Page.

Find the buttonsContainer component in the search, move it in the any place on the page and click Save button.
Testing the Button
When you click the button, a new Cheklist Run will be created in Manifestly service and the record will be displayed in the table below. The external ID of the Run will be the ID of the record that was being viewed with the button was clicked. This is important below for processes where you update Salesforce based on events in Manifestly.

Trigger Settings
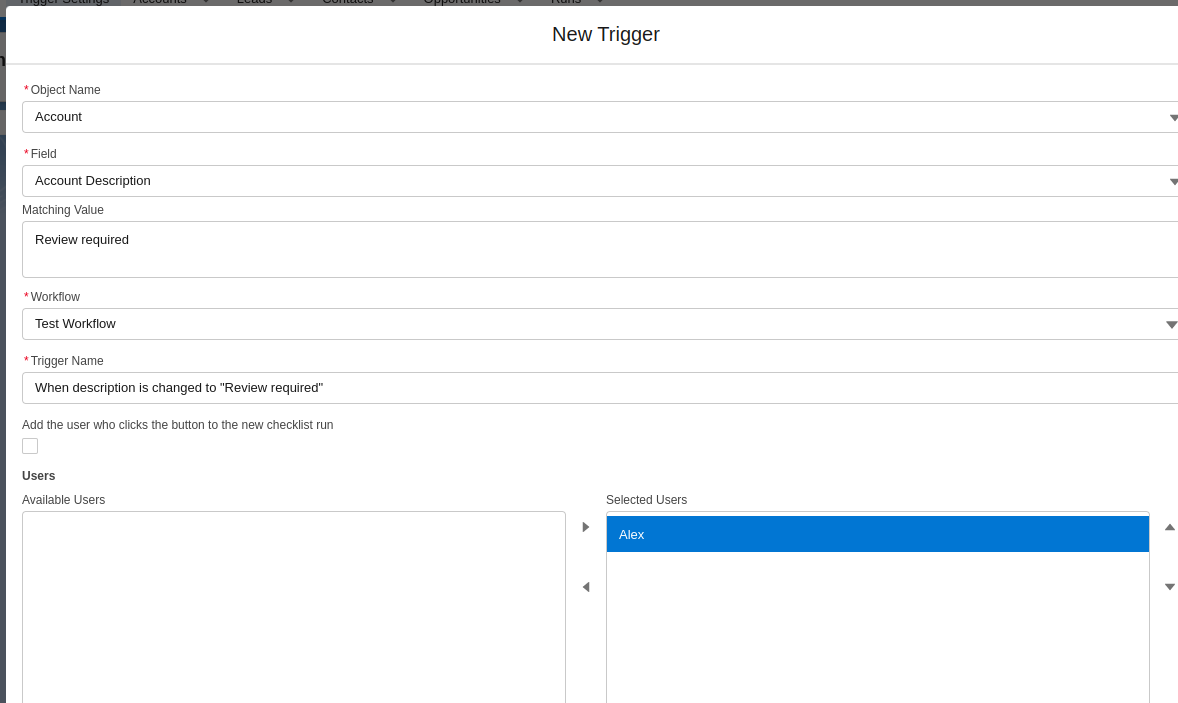
The Trigger Settings tab is similar to button settings. The goal of both of these tabs is to configure the system to create a new Run in Manifestly service with specified parameters. Buttons create Runs after clicking the button on the record page. Triggers create Runs after the record field is changed to a specified value.
The Trigger edit form is similar to Button edit form, but you can also select the object Field and Matching Value. After the record is changed and the selected field value is changed to the specified Matching Value, the action will be the same as after clicking the button — a new Run will be created and selected users will be added to the created Workflow Run.
History of Runs
You can check the history of the runs for each record in the Notes and Attachments section.

Also Manifestly app contains four tabs for standard objects for which the buttons and triggers can be created.
Webhooks
The webhooks implementation is a bit more technical than the button and trigger settings, but once they’re set up, it is easy to use the built in Salesforce Flow tool to update Salesforce based on events in Manifestly.
On the Salesforce side we have a Webhook listener which is waiting for payload from Manifestly and then creates objects in Salesforce. The two objects are
- Run
- WorkflowStep
This logic is implemented in the Rest class: ManifestlyWebhookListener.cls
To receive the Manifestly Webhook in Salesforce, you need to grant access to that class via a public site.
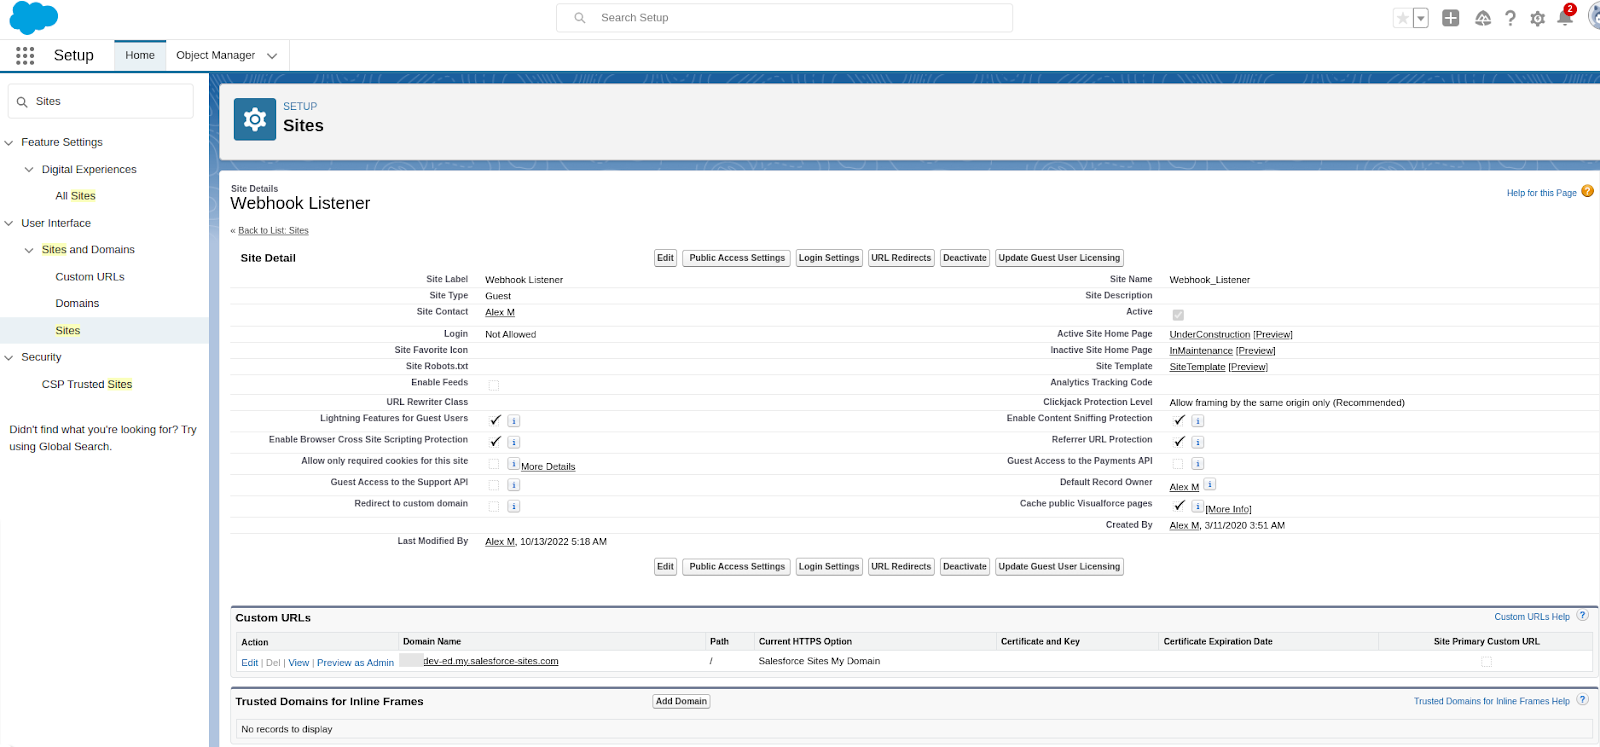
From the Salesforce Setup, go to User Interface > Sites and Domains > Sites
and then create a new site. Remember the URL you’ll see after creation, we’ll need it later.
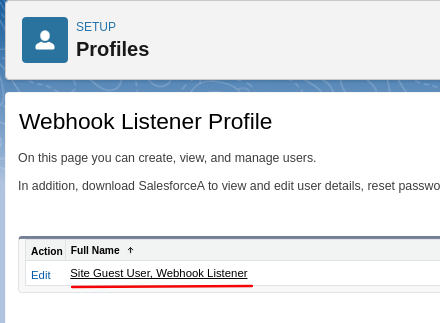
If you already created a site, click the site name in the list at the bottom of the page to get to the Site Details page, specifically, the Public Access Settings button. On the next screen click the View Users button.

Open the Guest User profile page.
Go to the Permission Set Assignments section.
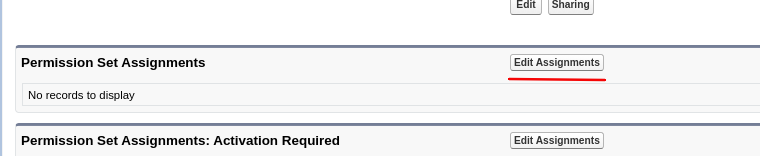
Add the Manifestly Webhook Permission and click Save button.

Make the site active (click on Activate button).
Now, take the site URL and add services/apexrest/Manifestly/create to the end of this URL. This is the webhook URL you will put into Manifestly.

This is the endpoint you should use as a link when set up A Webhook integration in Manifestly.
To create a new Webhook in Manifestly, find the required workflow record and click Webhook button in the More Actions dropdown.

For details about the events available for webhooks, please read our webhook help article.
After the Salesforce app receives the webhook request from Manifestly, it will create a Run record and related record (Workflow, Step, Step Data) that contains information about Run and Step.
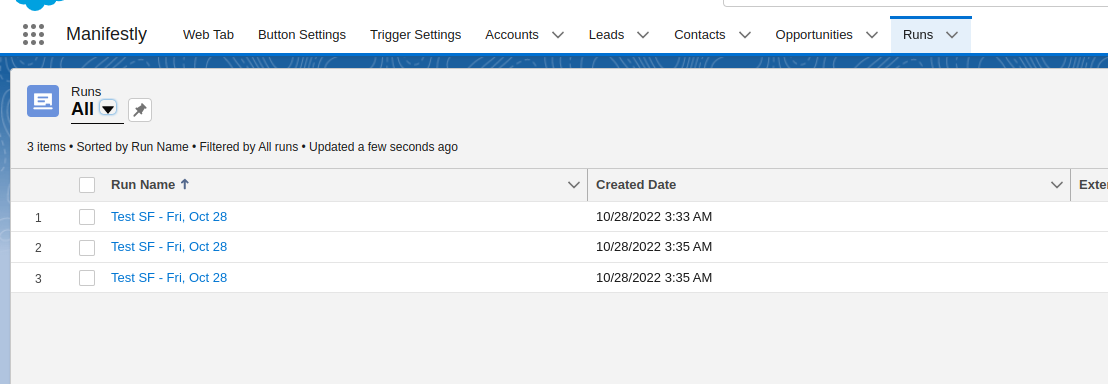
The last tab in the app is Runs, this contains the list of the Run records that are created by Manifestly webhooks.
This feature works through standard Salesforce Flows. You can create a Flow that will be triggered after Run record creation (Run/Step completion/start/late on the Manifestly side). Flows can be used to update records on the Salesforce side using Manifestly Workflow/Step data or perform any other available actions.
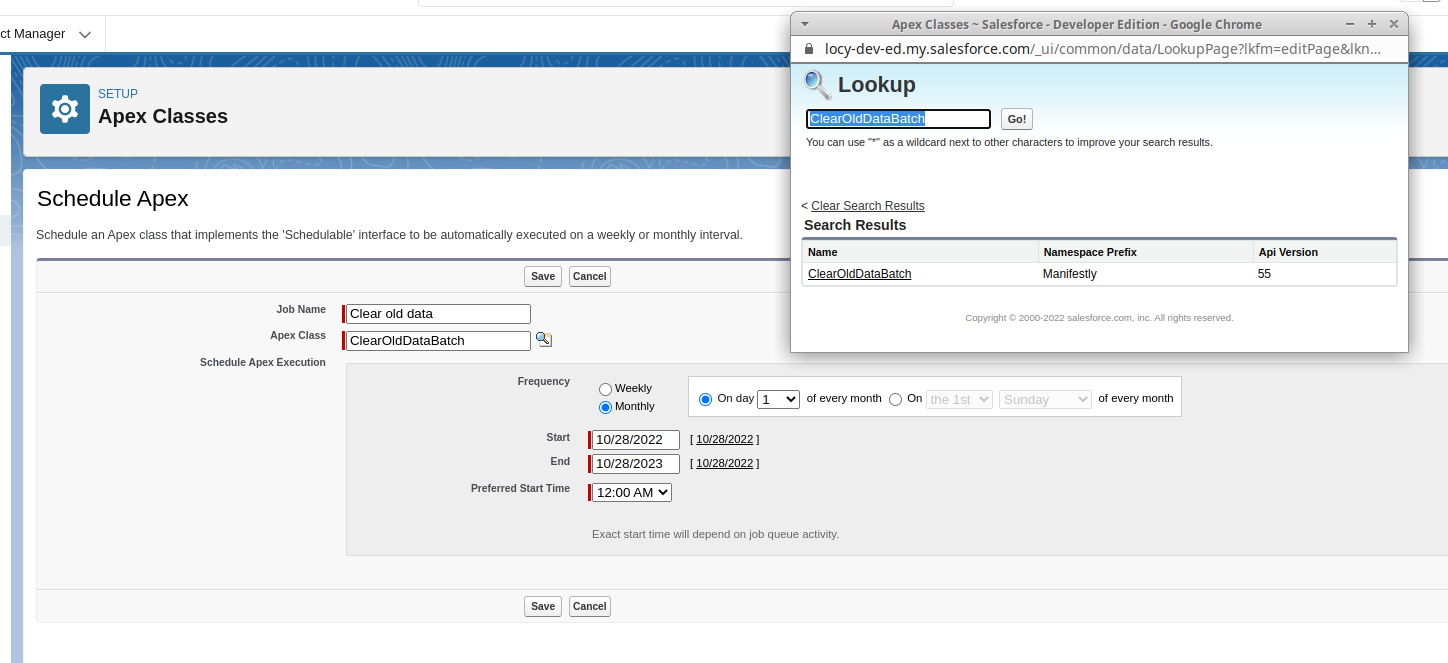
If you frequently use the webhook feature, you will accumulate data (Runs, Steps, Step Data). To avoid wasting storage, you can schedule a job to periodically delete old data that is more than a month old.
To do this, go to Setup -> Apex Classes and click Schedule Apex button.

On the next screen enter Job Name, find ClearOldDataBatch in the Apex Class lookup. Select frequency, enter Start and End Date and click Save button.